Softphone Salesforce Integration: Easy Setup Explained

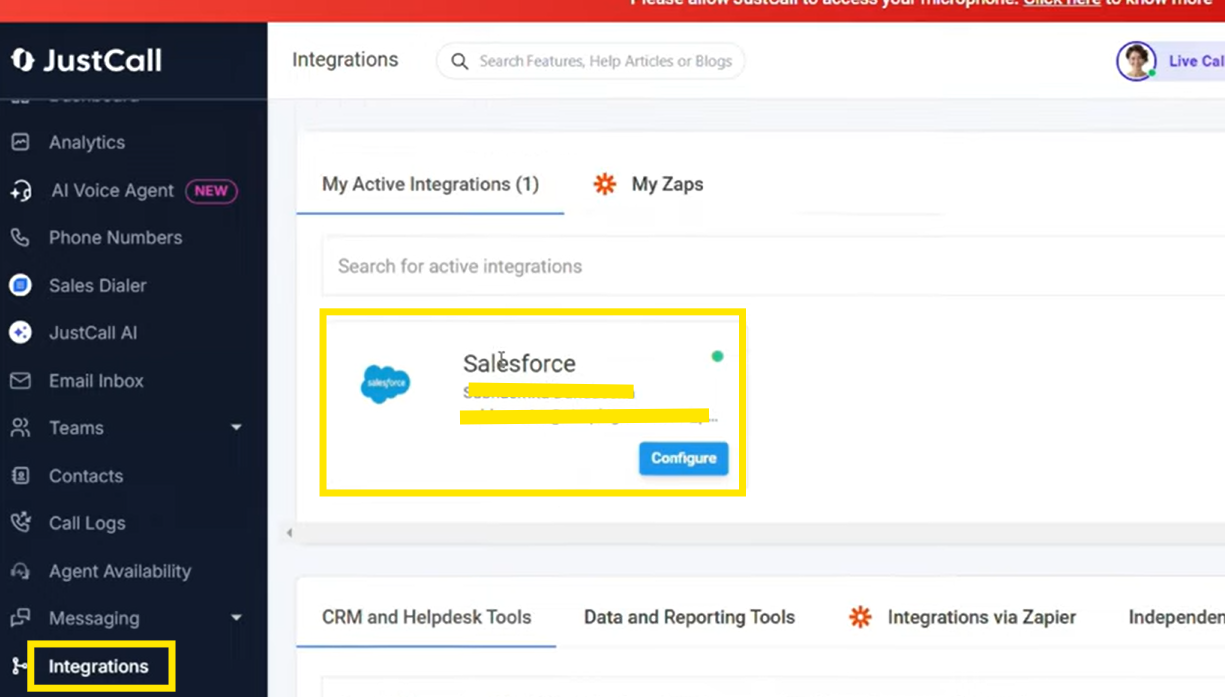
Softphone integration with Salesforce enables businesses to enhance agent efficiency, improve customer interactions, and optimize workflows. If you’re a beginner looking to integrate these two systems, this guide will walk you through the setup process step by step.

What is Softphone & why Integrate with Salesforce?

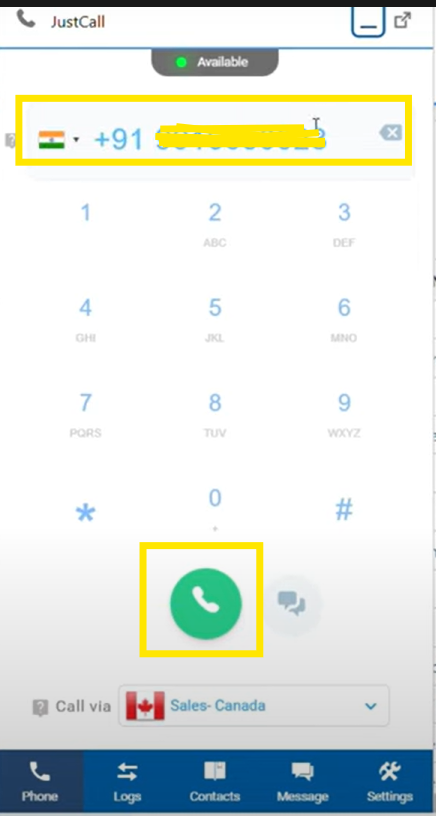
A softphone is a software-based phone that allows users to make and receive calls over the internet using VoIP (Voice over Internet Protocol) technology. When integrated with Salesforce, softphones enable agents to manage calls directly within the CRM, access customer data in real time, and automate call logging.

Key Benefits of Softphone Integrating with Salesforce

Automated Call Logging

Saves time and ensures accurate record-keeping. 

Streamlined Workflows

Automate follow-ups and call routing for better communication management. 

No need to switch between apps

Agents can handle calls directly in Salesforce without switching between applications.

How to Set Up Softphone Integration with Salesforce (Step-by-Step Guide)

Step 1: Choose a Compatible Softphone Provider

To get started, select a softphone provider that supports Salesforce integration. Some popular options include: 

👉 Amazon Connect
👉 RingCentral
👉 Five9
👉 Vonage
👉 JustCall

Here, we are going to use “JustCall” 

Step 2: Install the Softphone App in Salesforce

  1. Log in to Salesforce and then go to AppExchange.
  2. Search for your softphone(JustCall) provider’s integration application. 
Installing softphone app

3. Click Install and follow the on-screen instructions. 

Install in production
Install justcall

4. Assign Licenses as required. 

Add users

Step 3: Configure Open CTI (Computer Telephony Integration)

  1. Navigate to Salesforce Setup. 
  2. Search for Call Centres and add/assign a user who will access the call centre. 
Call center

3. Save the settings. 

Justcall

Step 4: Connect Your Softphone to Salesforce

  1. Open the Softphone(JustCall) Settings in Salesforce App Launcher. 
Softphone settings

2. Authenticate using your VoIP provider’s credentials. 

3. Here we are already connected, so it is showing as re–connect, but for the first time when you integrate, it will show you the “Connect” button. You must click that to go further. 

Setup justcall

4. After you click connect, it will redirect you to the JustCall app, where you must configure the Salesforce 

salesforce integrate

5. Test the integration by making a test call. 

make call
justcall

Step 5: Customize Call Workflows and Automations

  1. Set up Click-to-Call functionality for easy outbound calling.
  2. To bring this button, go to setup > app manager >  select the app that we need to enable the softphone. Add it to the utility bar 
click to call functionality

3. Enable Automatic Call Logging to store call details in customer records. 

Automatic call logging

Best Practices for a Smooth Integration

  • Ensure a Strong Internet Connection – VoIP calls require stable connectivity. 
  • Train Agents on Softphone Features – Help them utilize call transfer, recording, and other key functions. 
  • Monitor Call Analytics in Salesforce – Track performance metrics and optimize call handling.

Upgrade your workflow with Softphone Integration with Salesforce. Simplify calls, improve efficiency, and stay connected.

Why choose Simpliigence for Salesforce Softphone Integration?

Integrating a softphone with Salesforce can significantly enhance your customer service operations by improving efficiency and streamlining communication. By following this step-by-step guide, beginners can set up and start using softphone integration with ease. 

This website uses cookies and asks your personal data to enhance your browsing experience. We are committed to protecting your privacy and ensuring your data is handled in compliance with the General Data Protection Regulation (GDPR).